
Recording
Desktop app settings
Configuring how the desktop recorder behaves
Caven Studio is set up in two places:
- In Caven Studio itself, through the settings panel on the recorder: appearance, updates, audio devices, meeting detection and permissions.
- In the web app, under Settings → Desktop Application: start-up and upload behavior, the audio pop-up and the calendar pop-up. These settings sync to Caven Studio automatically.
In Caven Studio
Click the gear icon on the recorder bar to open the settings panel.
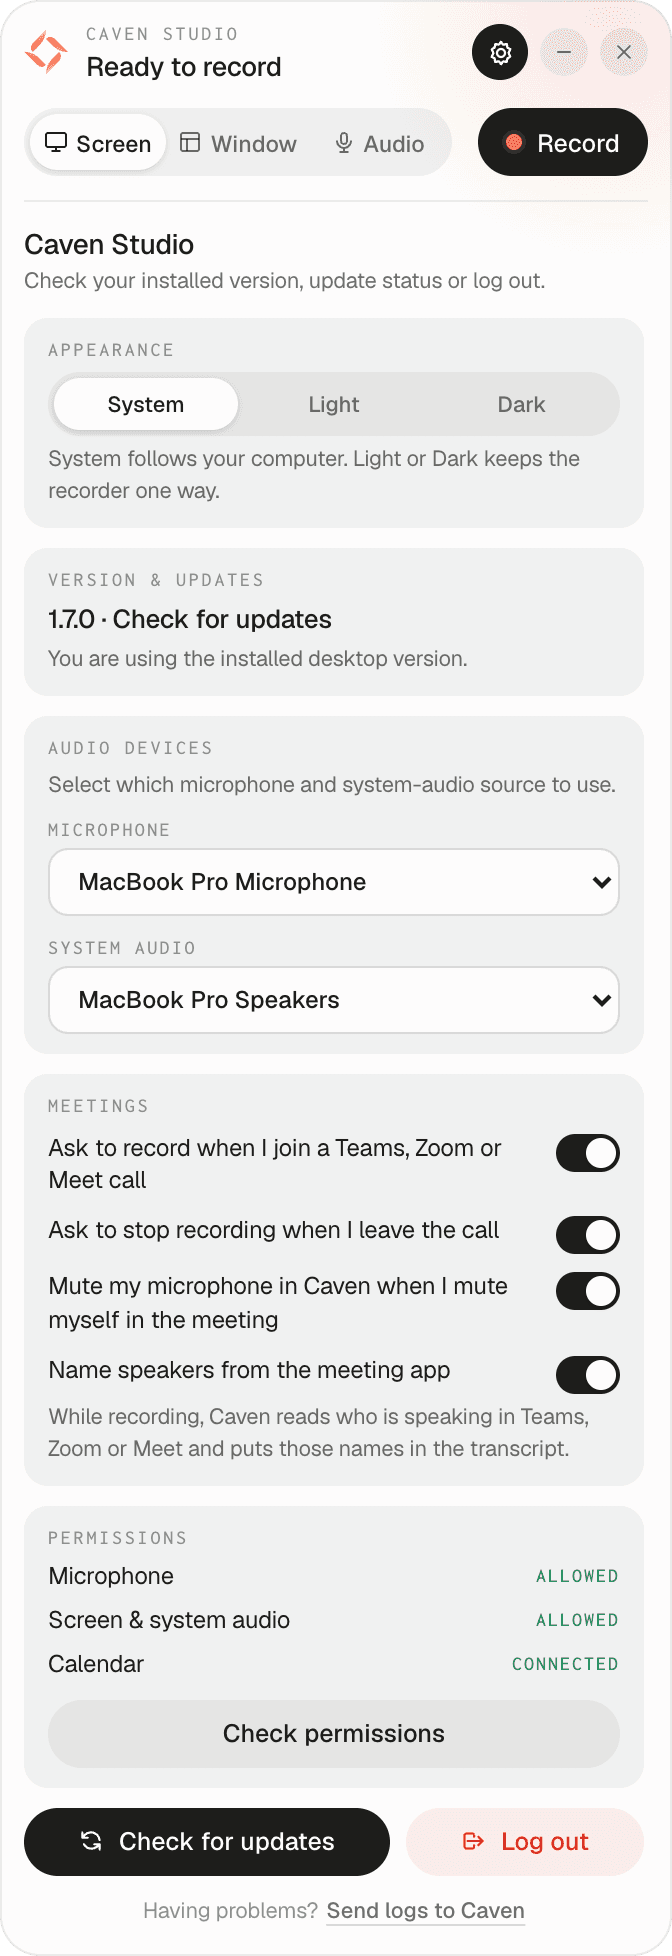 The Caven Studio settings panel with Appearance, Version & updates, Audio devices, the Meetings toggles, Permissions and Send logs
- Appearance: System (follows your computer), Light or Dark.
- Version & updates: the installed version. Click Check for updates to look for a newer one; Caven Studio downloads it and restarts on its own.
- Audio devices: the default Microphone and System audio source for your recordings. You can also switch either one during a recording, see Recording a meeting.
- Meetings (macOS and Windows): four switches, all on by default.
- Ask to record when I join a Teams, Zoom or Meet call: show a pop-up when you join a call. Slack huddles and Webex are recognized too.
- Ask to stop recording when I leave the call: ask whether to stop when you leave the call you are recording.
- Mute my microphone in Caven when I mute myself in the meeting: your microphone is not recorded while you are muted in the meeting app.
- Name speakers from the meeting app: while recording, Caven reads who is speaking in the meeting app and puts those names in the transcript. On macOS this needs Accessibility permission; the panel tells you when it is missing.
- Permissions: shows whether the microphone, screen and system audio, and calendar are allowed or connected. Click Check permissions to go through them. When something required is missing, the button reads Fix permissions and the gear on the recorder bar shows a warning dot.
- Log out.
- Having problems? Send logs to Caven: sends the app's technical log to support. See Sending logs to Caven.
In the web app
Open Settings → Desktop Application in the web app. Change what you need and click Save Settings.
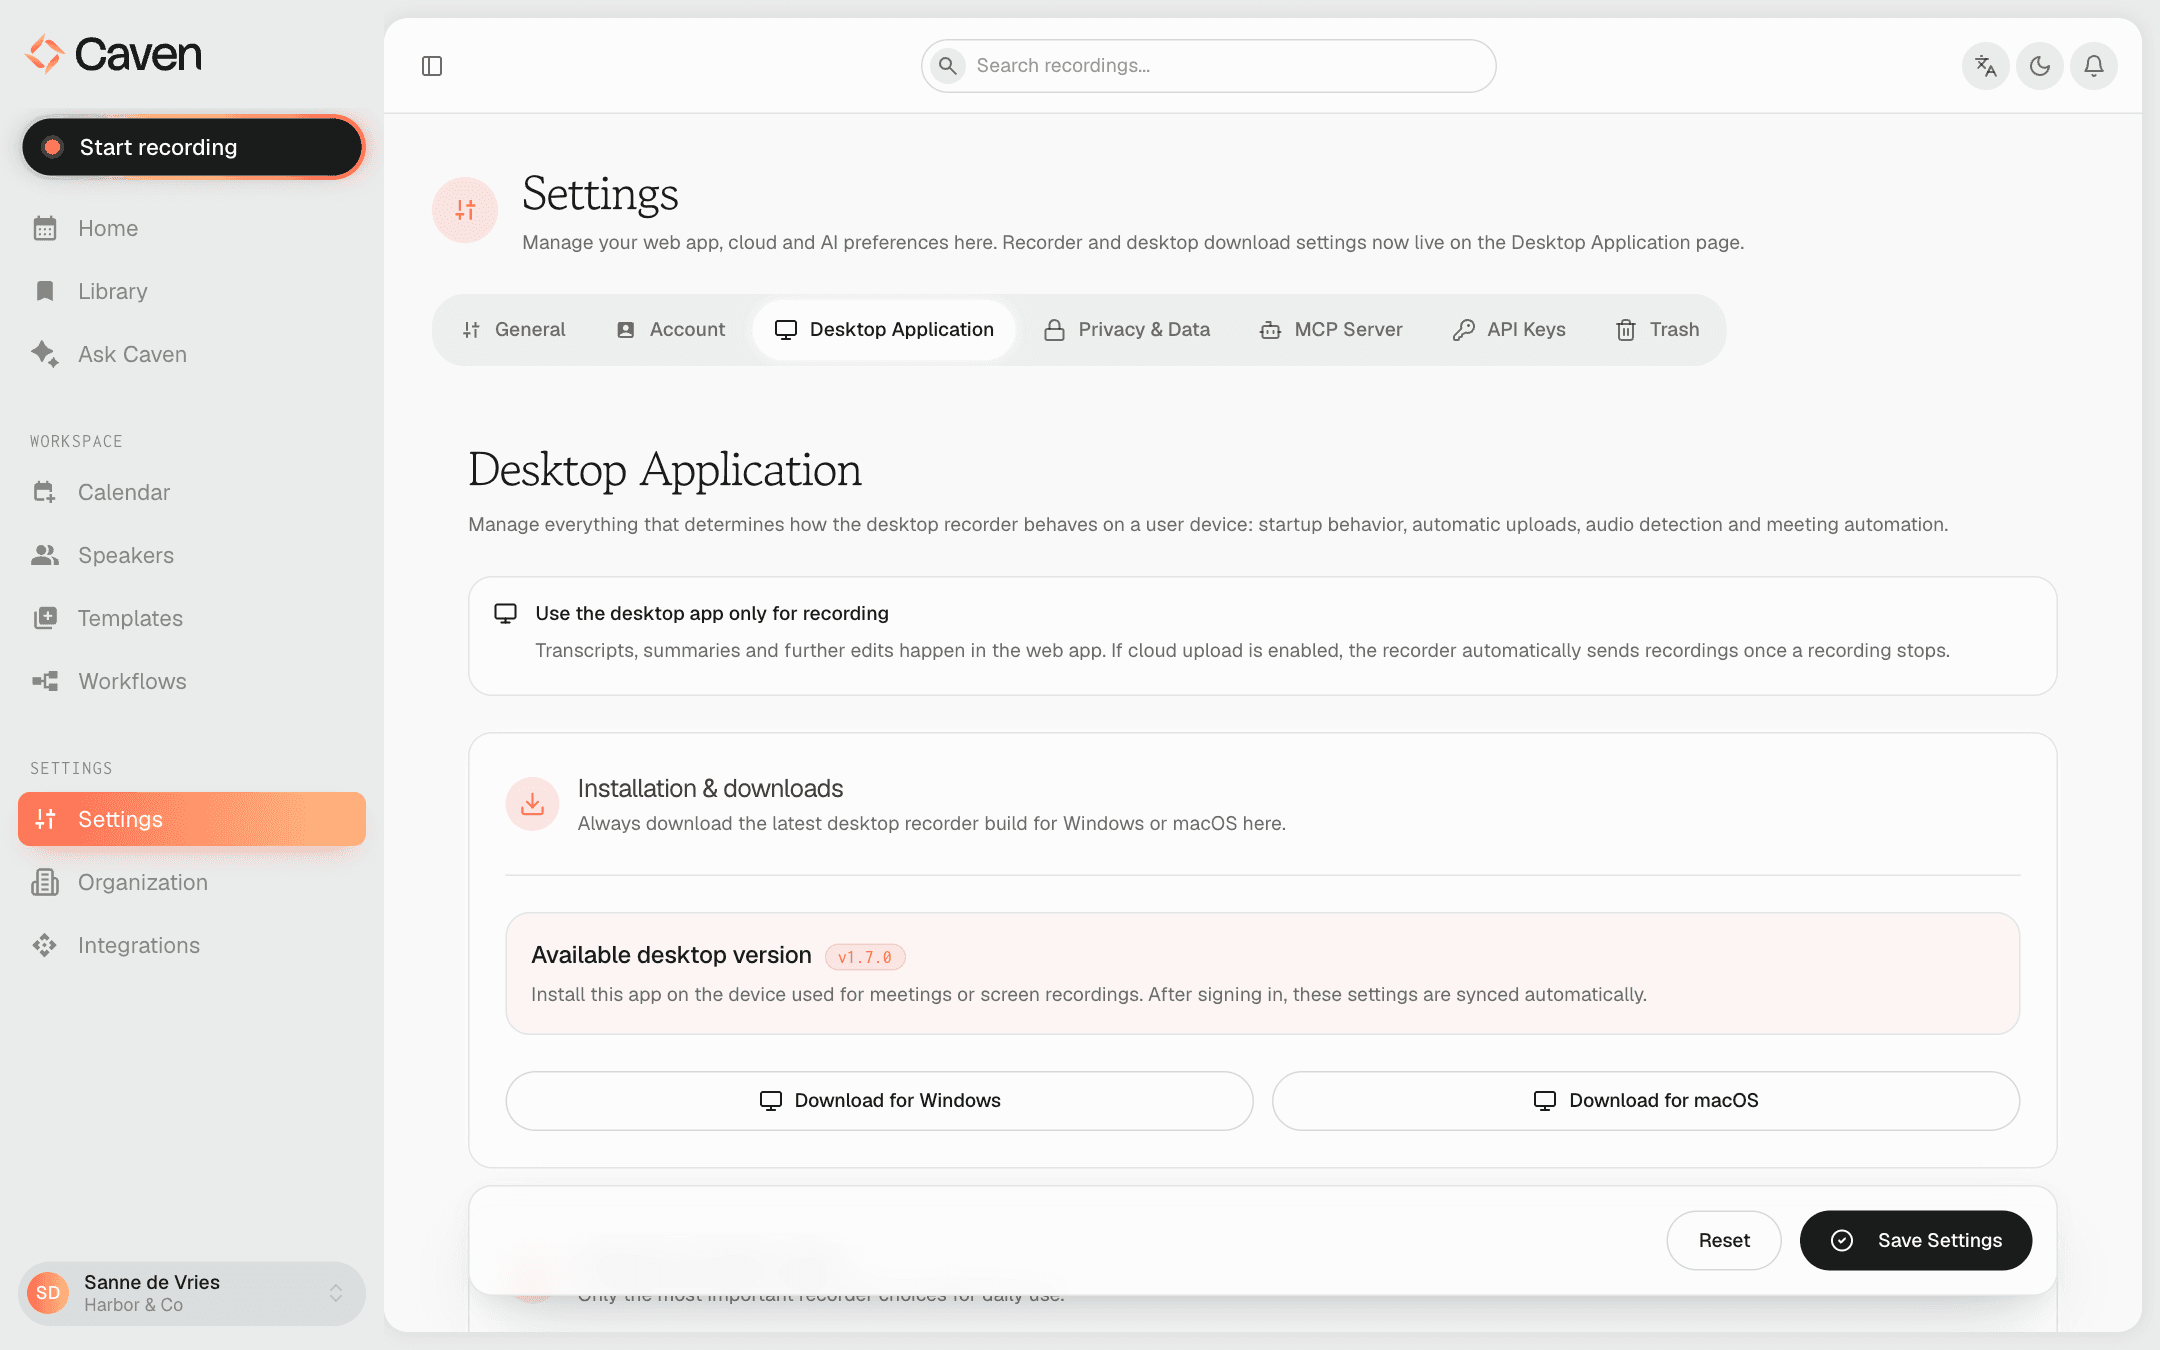 The Desktop Application tab in the web app settings
Installation
Download links for Windows and macOS, and the latest available version. Caven Studio updates itself; this section is where you get the installer for a new computer.
Recorder basics
- Start desktop recorder automatically: open Caven Studio when your device starts.
- Automatically upload to cloud: upload each recording as soon as it stops. The local copy is only kept until the upload is done.
Audio detection
Caven Studio can listen for meeting audio and offer to record when it hears a conversation. This is off by default.
- Enable audio trigger: show a recording pop-up when meeting audio is detected.
- Audio detection threshold and Detection delay (seconds): how loud, and for how long, audio must be present before the pop-up appears.
- Snooze duration (seconds): how long a snoozed pop-up stays quiet.
- Popup position and Popup size: where the pop-up appears and how large it is.
Recording from your calendar
With a calendar connected, Caven Studio can prompt you to record your scheduled meetings.
- Calendar popup for meetings: turn the meeting pop-up on or off.
- When to start: show the pop-up At start time, or Before the meeting. With Before, set the number of Minutes before.
- Stop automatically when meeting ends and Stop when you leave the meeting are shown as coming soon and cannot be turned on yet. To be asked to stop when you leave a call, use the Meetings switch in Caven Studio itself.
See Recording a meeting for how this plays out during a meeting.